Inside a Valley Ranch Kitchen Remodel, Phase by Phase
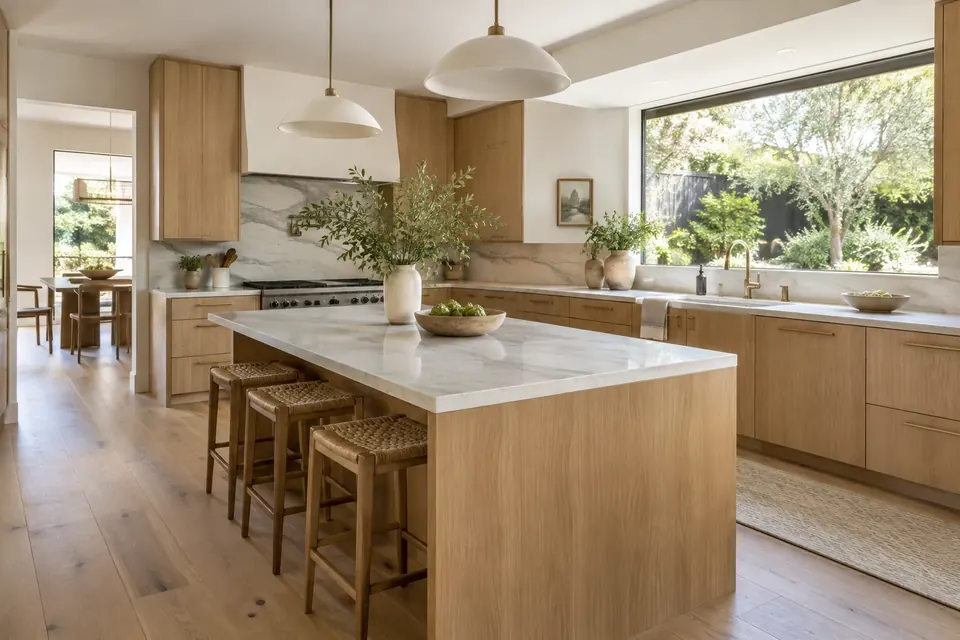
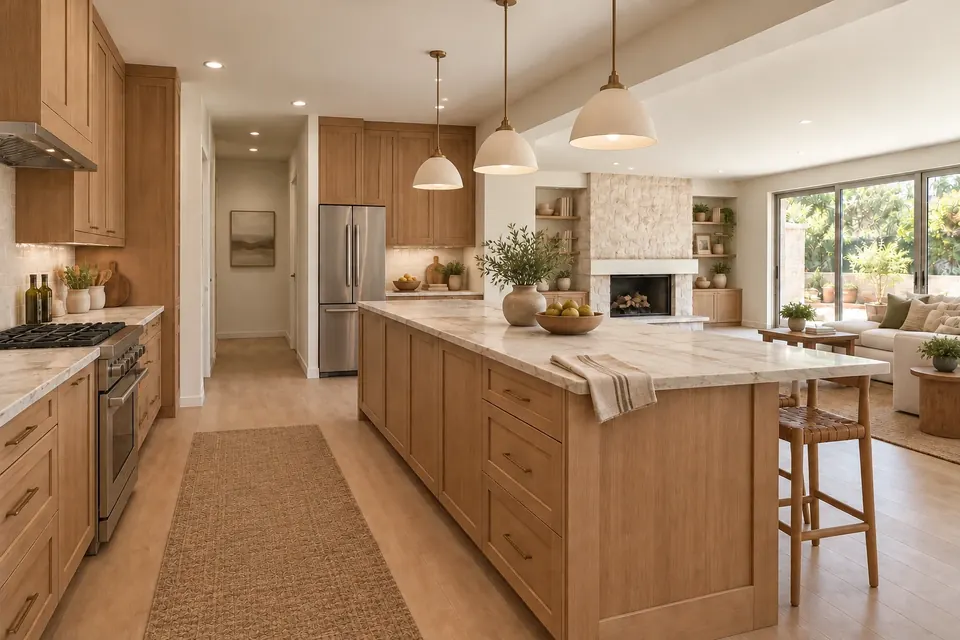
A closed-off 1950s kitchen, a wall the family wanted gone, and a clear sequence from first measurements to final walkthrough. Here's what each phase of an open-plan kitchen remodel looks like — and what can move the schedule.
Representative project (composite) — based on typical Tulip work, not a specific client.
Opening a 1950s ranch kitchen to the family room is very doable, but it starts with a structural question, not a design one: what is that wall holding up? Once an engineer answers that and the City of Los Angeles approves the plans, the work follows a predictable order — demolition, rough-in and inspections, drywall, cabinets, stone, tile and finishes, then the punch list. This story walks through each phase as it typically unfolds for a project like this.
At a glance
- Who lives here: A family of four
- Location: San Fernando Valley (composite)
- Home: 1950s single-story ranch
- Scope: Full kitchen remodel; removal of the wall between kitchen and family room (with structural review); new cabinets, island, counters, lighting, flooring through the kitchen and family room; updated plumbing and electrical
- Typical duration: 5–9 months from the first design meeting, including about 10–16 weeks of construction
- Budget band: at or above the top of our typical $60K–$120K kitchen range, because of the beam, the relocated utilities and flooring through two rooms
- Design-build team: Tulip Remodeling (CSLB #1059213)
The starting point
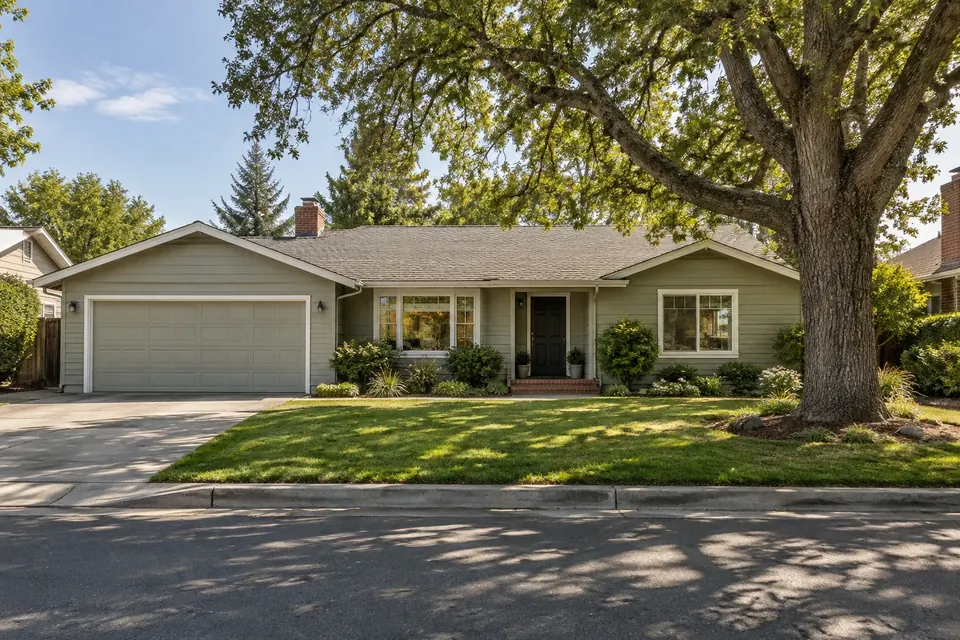
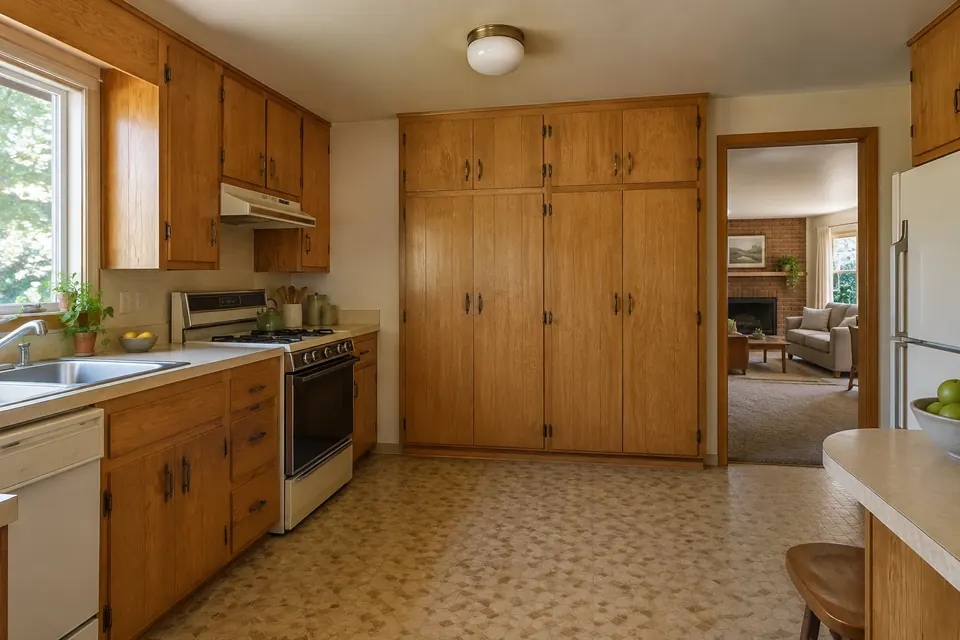
The house is a familiar Valley type: low-slung, single-story, with a kitchen tucked behind a wall off the family room. The homeowners described the problem simply. Whoever was cooking couldn't see the kids doing homework or the TV, the counters were cramped, and the single overhead fixture left the corners dark. They wanted one connected room, an island where people could sit, and storage that would keep the counters clear.
 Illustration
Phase 1: Consultation and measurements
The project starts with a free in-home consultation. A Tulip project leader walks the house with the homeowners, talks through how the family uses the kitchen day to day, and asks about priorities and budget.
For a project involving a wall removal, this visit includes a first look at the structure: which way the ceiling joists run, whether the wall appears to carry roof or ceiling loads, and what's likely running inside it — plumbing vents, electrical circuits, sometimes ductwork. Nothing is decided on the spot, but it shapes what the design and engineering will need to address.
Detailed measurements follow, including ceiling height, window and door locations, and the positions of existing plumbing and gas lines.
Phase 2: Design and 3D renderings
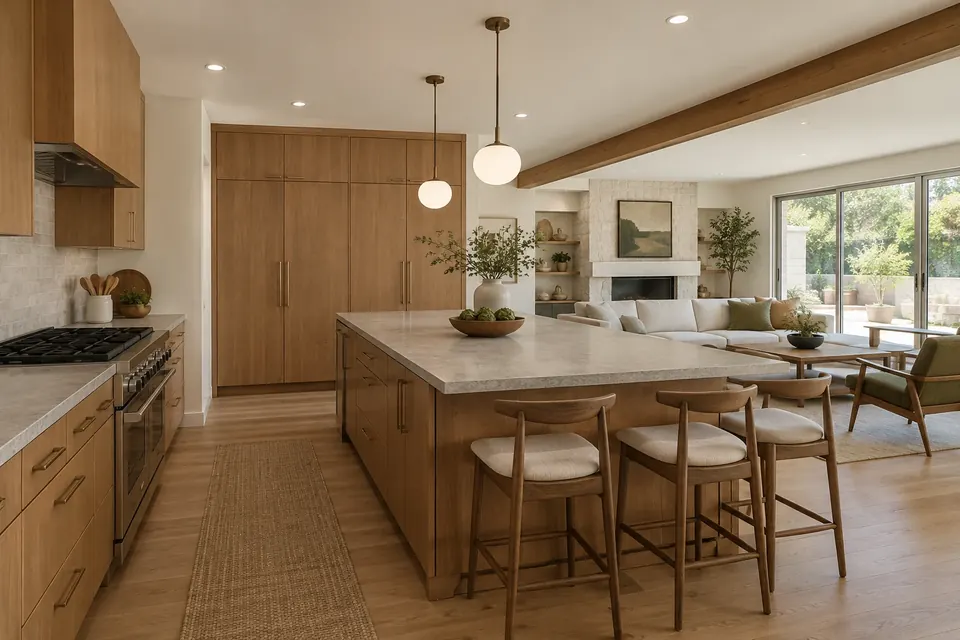
With measurements in hand, the design team develops a layout. In this case, the plan moves the sink to the new island so the person washing up faces the family room, keeps the range on an exterior wall for venting, and adds a full-height pantry run where part of the old wall stood.
The homeowners review 3D renderings of the new room, which help settle questions that are hard to judge from a floor plan: how big the island feels, how far the pendants hang, whether the cabinet color works with the new flooring. Selections happen during showroom visits with the Tulip team, where the homeowners have access to trade pricing on cabinets, stone, tile and fixtures.
 Illustration
Phase 3: Price and contract
A few business days after the first visit (usually 2–3), the homeowners have a written summary with an approximate price and timeline. Once the design is set, that becomes a contract: the final price, the scope, allowances for items still being finalized (such as light fixtures or hardware), and a payment schedule tied to completed work rather than calendar dates.
This is the point to ask questions. A good contract should make it clear what's included, what isn't, and what happens if an allowance item comes in over or under. It should also call out anything still uncertain — for example, that the final beam design depends on the engineer's review.
Phase 4: Permits (LADBS) and structural review
In the City of Los Angeles, permits for this kind of work go through the Los Angeles Department of Building and Safety (LADBS). Because the project removes a wall that may be load-bearing, a structural engineer evaluates it and specifies how the load will be carried once the wall is gone — typically with a new beam and supports sized for the span. Those engineering details become part of the permit drawings.
Permit timing varies with the scope and the city's workload at the time, so we give you a current estimate when we submit. The homeowners keep using their kitchen during this phase, which is a good time to finalize remaining selections so materials can be ordered before demolition.
Phase 5: Demolition
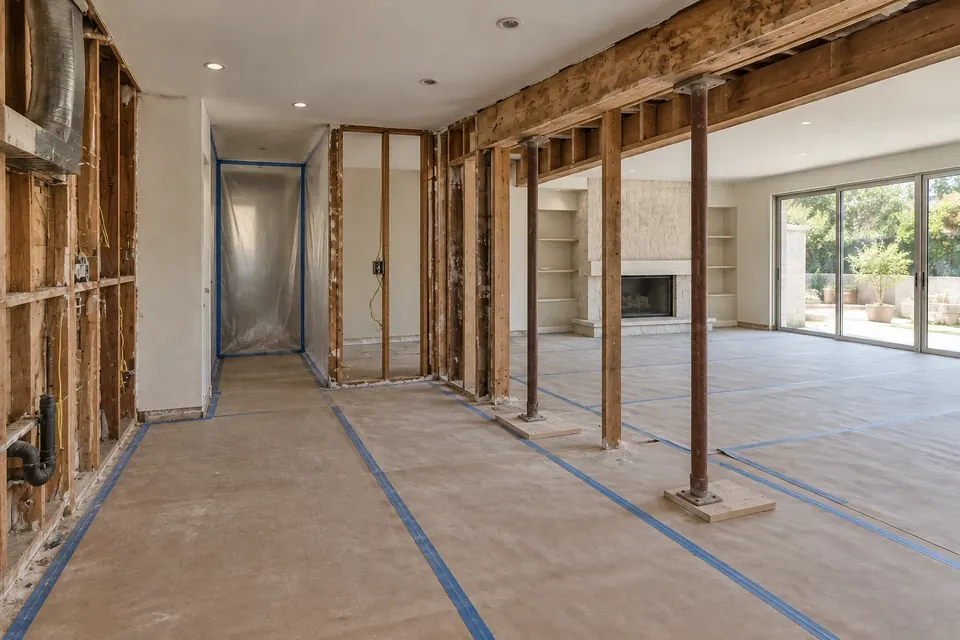
Before demo begins, the crew protects the rest of the house: floor protection along work paths, dust barriers at doorways, and a plan for where the family will make coffee and wash dishes in the meantime. Many households set up a temporary kitchen in a dining room or garage with a fridge, microwave and a folding table.
Then the old kitchen comes out — cabinets, counters, flooring, and the wall itself, with temporary supports in place as the engineer specifies until the permanent beam is installed. Demo often reveals things that weren't visible before: older wiring, patched plumbing, or framing that differs from what was expected. A Tulip supervisor is on site every working day and walks the homeowners through anything that comes up.
 Illustration
Phase 6: Rough-in and inspections
With the space open, the trades do their "rough" work — everything that will end up hidden inside walls, ceilings and floors:
- Framing: the new beam and supports go in according to the engineered plans.
- Plumbing: new supply and drain lines for the island sink and dishwasher.
- Electrical: new circuits for appliances, recessed lighting, under-cabinet lighting, pendants and island outlets.
- Mechanical: ducting for the range hood.
The city inspector then reviews the rough work before anything is covered up. This is one of the moments where schedules can shift: inspection dates depend on availability, and any correction has to be made and reinspected before drywall goes up.
Phase 7: Drywall
After rough inspections pass, insulation (where required) and drywall go in. Drywall involves hanging, taping, several coats of joint compound and sanding, with drying time between coats. Then comes primer. It's a quiet-looking phase, but the quality of the taping and sanding shows in the finished room, especially where the old wall used to meet the ceiling.
Phase 8: Cabinets and templating
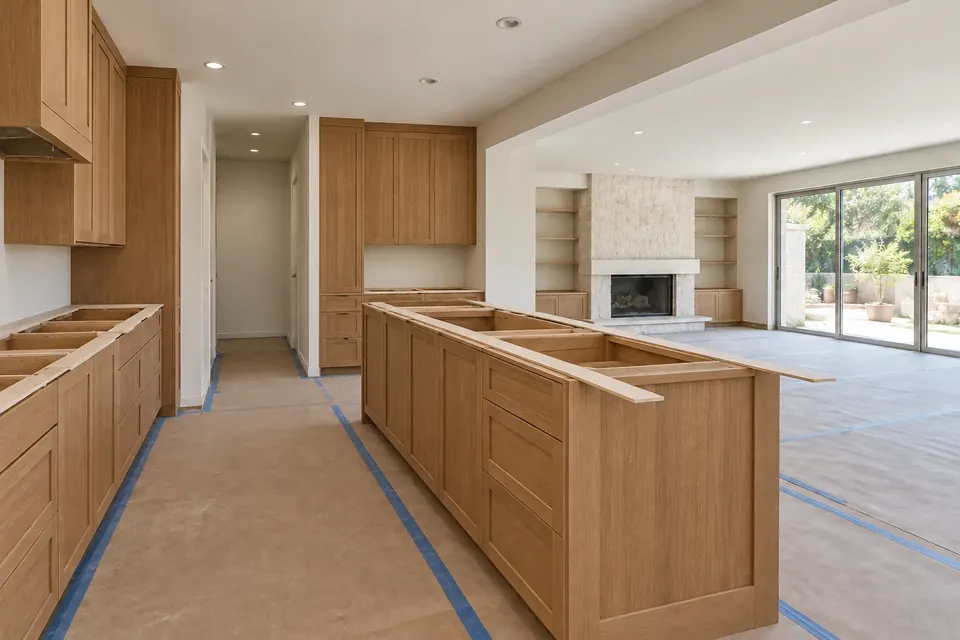
Cabinets arrive and are installed — perimeter first, then the island. The installer levels and secures each box, since the countertop will only be as flat as the cabinets beneath it.
Once the cabinets are in, the stone fabricator comes to template: they measure precisely for the countertop, including sink and cooktop cutouts and any overhang at the island seating. The template is what the slab is cut from, so cabinets need to be fully installed and correct first.
 Illustration
Phase 9: Stone
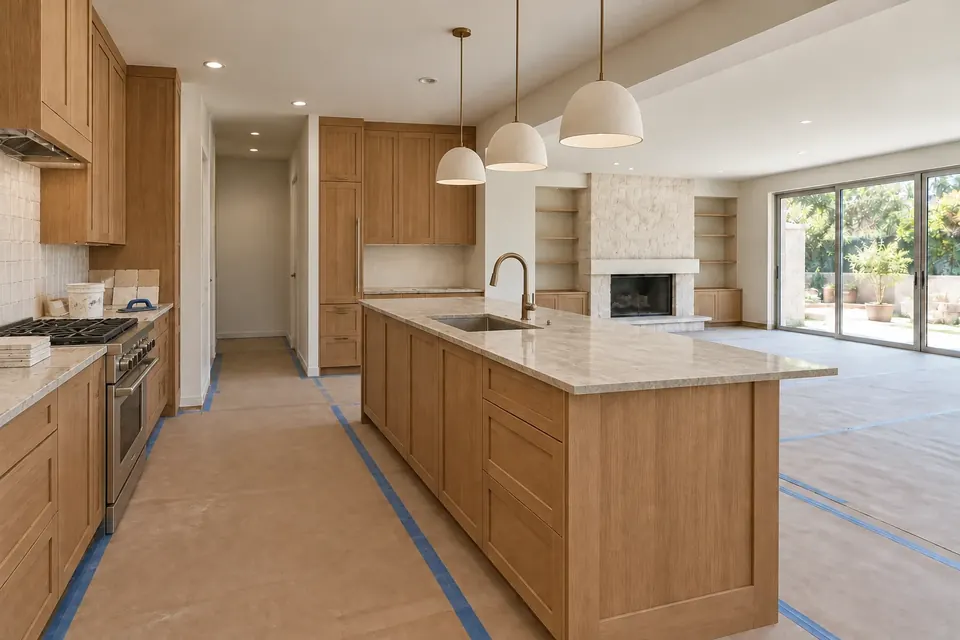
The fabricator cuts the slab to the template and installs it, including the undermount sink. The homeowners in this composite chose a soft-veined quartzite; many families visit the stone yard to see the actual slab and discuss where the seams and veining will fall on the island. The template is taken once the cabinets are installed, with the sink, faucet and cooktop on site, and the tops usually go in one to two weeks later, depending on the shop and the material.
Phase 10: Tile and finishes
With counters in, the room comes together quickly:
- Backsplash tile is set and grouted.
- The plumber connects the sink, faucet and dishwasher.
- The electrician installs fixtures, pendants, under-cabinet lights and devices.
- Appliances are set and connected.
- Hardware goes on, paint is touched up, and trim is finished.
Final inspections happen in this phase as well.
 Illustration
Phase 11: Punch list and final walkthrough
Before the job is called complete, the Tulip supervisor and the homeowners walk the room together and list anything that needs attention — a drawer that needs adjusting, a paint touch-up, a grout line. Those items are fixed, and then there's a final walkthrough to go over the finished work, how to care for the materials, and warranty information.
The wall is what everyone notices, but most of the work is in the order of operations. When rough-in and inspections go cleanly, the rest of the job tends to follow.
 Illustration
What can change the schedule
Every remodel has a plan, and every plan has variables. The most common ones on a project like this:
- Permit and plan review timing. City workloads vary, and corrections requested by plan check add time.
- Structural findings. The engineer's solution for the wall, or conditions discovered at demo, can add steps.
- Hidden conditions. Older homes can reveal outdated wiring, deteriorated plumbing or previous unpermitted work once walls are open.
- Inspection scheduling and reinspections.
- Material lead times, especially custom cabinets, special-order tile and stone fabrication.
- Changes after construction begins. Moving an outlet is small; moving the sink after rough-in isn't.
Tulip's approach is to surface as many of these as possible before construction — during the consultation, design and estimate — and to keep the homeowners informed throughout once work begins.
Next steps
Sources
- Los Angeles Department of Building and Safety (LADBS (opens in new tab)), permitting authority for the City of Los Angeles
- Process details reflect Tulip Remodeling's standard design-build process.